Starbright Stars: Cutting

Welcome to September! What’s more fun than starting school? Starting a new quilt, of course! And maybe, probably also sharpening your angled patchwork piecing skills along the way. You’re welcome =)
This fall I am hosting one of my most-requested sew-alongs ever. Starbright Stars quilt is easier to sew than you would think. Make something special with your fabric scraps or sew that fabric stack that has been waiting into a sparkly wonder.
To find out how to join the Starbright Stars sew-along, click over to the master sew-along post. It’s a digital pattern, so you can grab it in a flash and sew right along.
Week 1: cutting
Hopefully you already have a copy of the Starbight Stars quilt pattern and have been gathering fabrics for this quilt. You really can’t go wrong, because Starbright Stars is charming in just about any color scheme. I shared my own journey to an autumnal palette here. Still stumped? If you live in Europe, maybe those Tilda fabrics, which I’ve already cut into diamonds, are a happy solution. I’ve just discounted them today!
Cutting Directional Diamonds
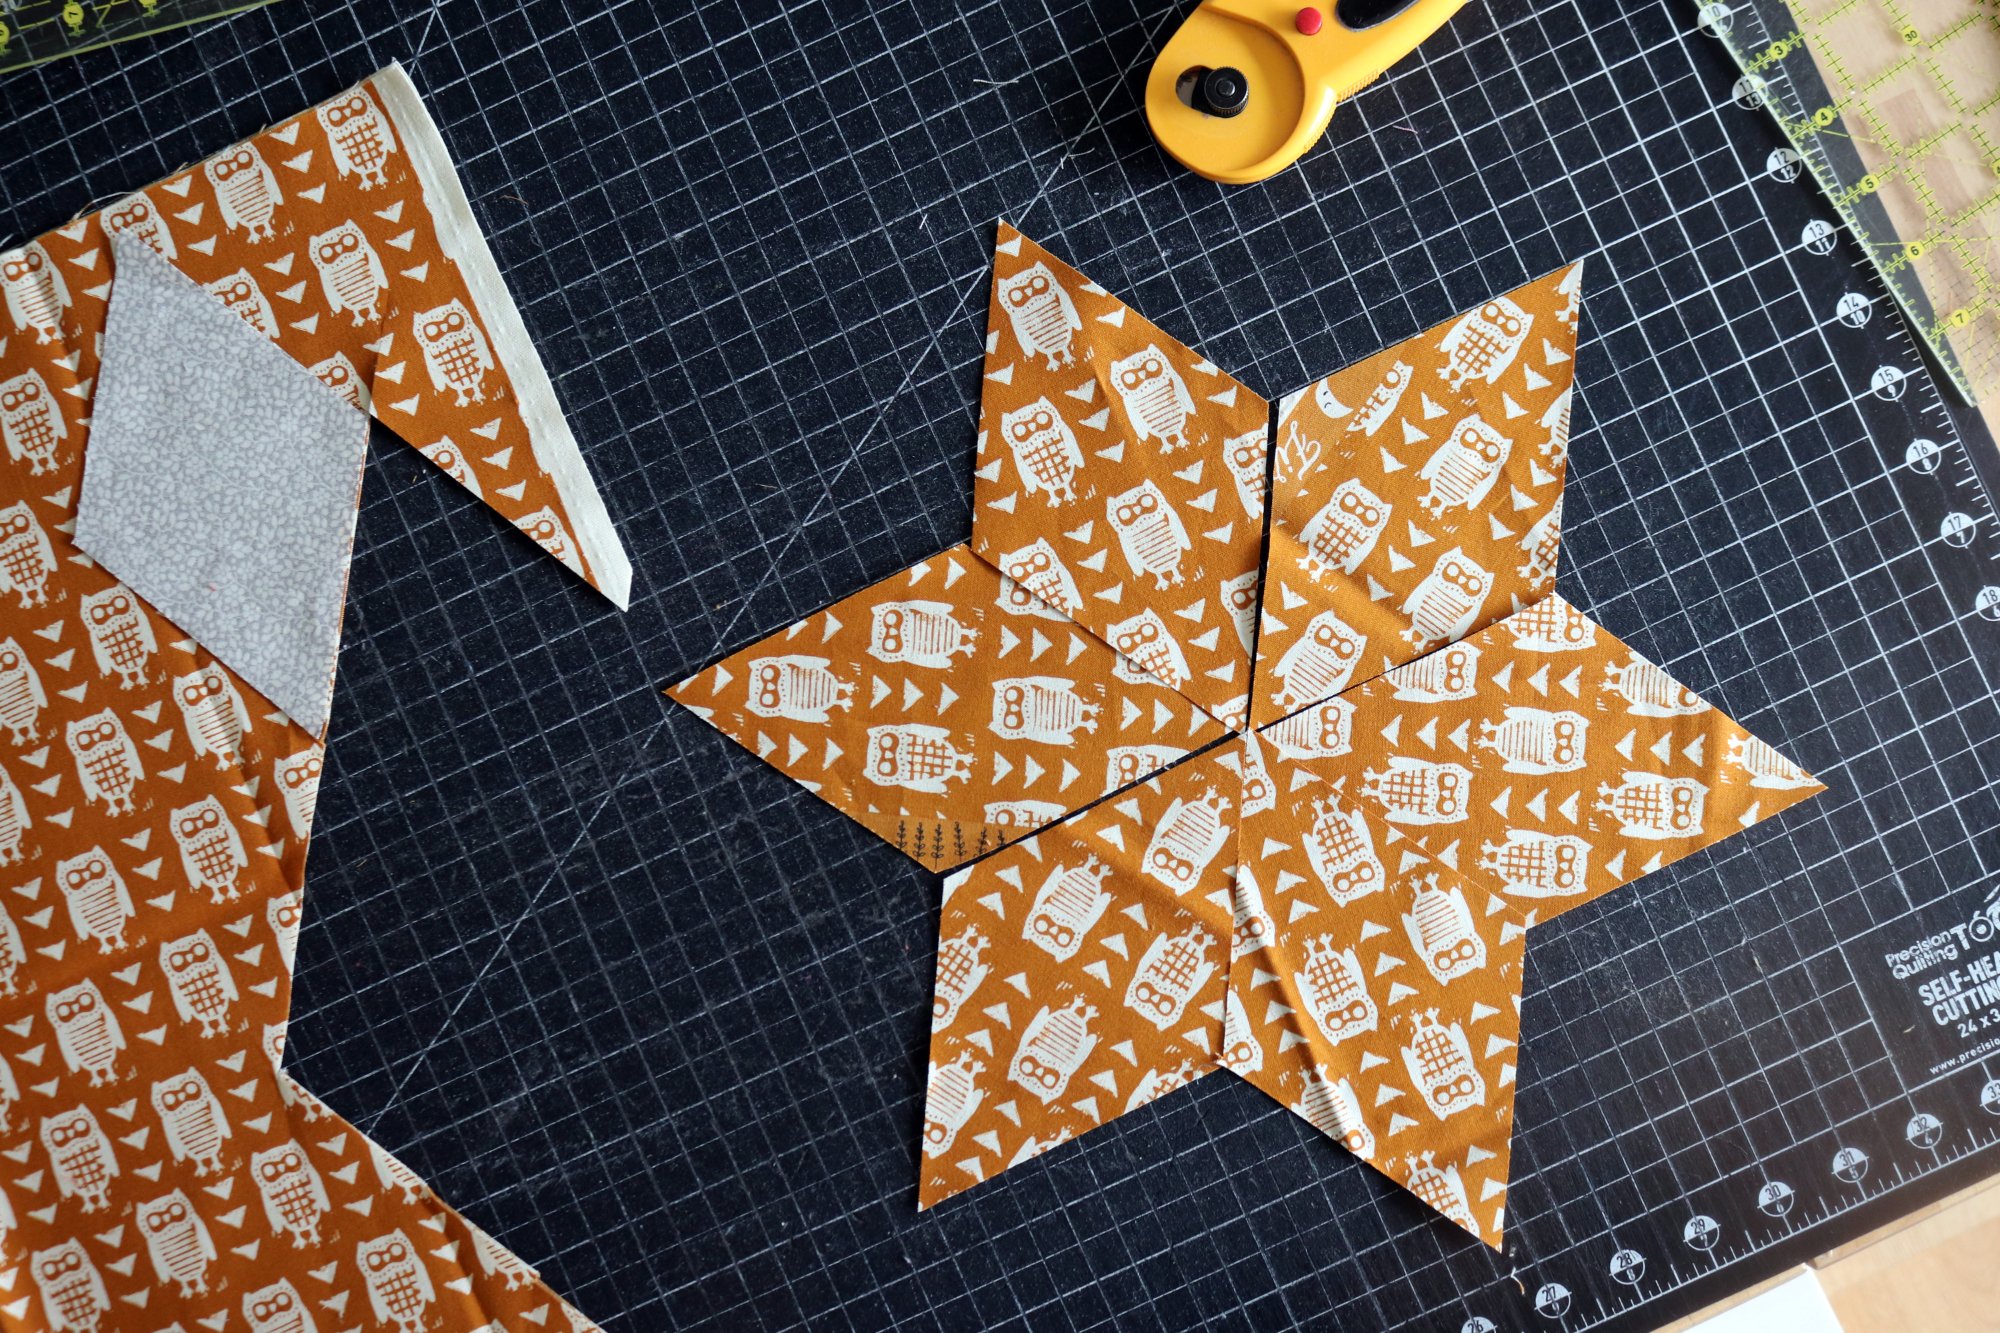
I always start my Starbright Stars quilts by cutting the diamonds. They’re the most fun, of course, and when you arrange them as stars on a design wall it feels like a quilt is really happening!

The pattern demonstrates the most fabric-efficient manner for cutting the diamonds. However, if your fabrics are directional, with stripes or owls, for example, you may want to take the time to cut in a way that takes advantage of that feature.

For example, each of the above stars has a directional geometric print. I cut the diamonds so that the print is “straight” with each diamond. As a result, the directionality emanates from the star center, emphasizing the star shape.
Here’s what I did. I cut with my fabric folded/double layered for speed. For my cutting template, I used an already-cut diamond (cut as per pattern directions). I placed the template over the fabric in the desired orientation and cut around it, aligning my ruler with the edges of the cutting template. After cutting one diamond, I was able to cut diamonds adjacent to the first, so as not to waste fabric unnecessarily. It’s true that there is much fabric waste along the edges of the fabric, but the effect is totally worth that waste, in my opinion.


If I had cut these diamonds as per the pattern, the owls would be slanted on the diamond, instead of standing with their feet toward the star center. I also like that this method yields a star that is “right side up” from every direction.
Now I’m in the process of cutting diamonds in bulk. The non-directional prints I cut as per the pattern, to save fabric, while the directional prints I cut with the cutting template as above.

So, this week is all about cutting! I have a lot more to go, including all of the triangles. Time to put on some music and enjoy the flow!
Week 1 Sew-Along Goal: Cutting
Cut all diamonds and background triangles for your Starbright Stars quilt.
Share to win!
This week share a photo of your fabrics with hashtag #StarbightStarsQuilt.
Your photo enters you into a giveaway for the Trimmings Pattern Pack. This is a three-pattern bundle of my best holiday sewing projects: a very cool tree skirt, patchwork stockings and a festive pillow.
Winner will be announced next week and giveaway is open worldwide.
Congratulations to Ann Bartley, lucky winner of the Kick-off giveaway for Angled class membership!


good luck, friends!