Quilter's Crib Sheet tutorial
If you're a quilter, you can make crib sheets in your sleep. Trust me. Actually, this project is truly appropriate for a brand new sewist. The hardest part is cutting the fabric (which is easy for a quilter). There are oodles of crib sheet tutorials, I'm sure; but I ended up splicing together different tips from several sources and adding my own quilter-friendly cutting approach, so I figured I ought to record it for my next batch of sheets. Come see!

Supplies
2 yards fabric
large square ruler, optional
80" of 1/4" or 3/8" elastic
large safety pin for threading elastic
Step 1: Cutting
First, prewash and machine dry your fabric to induce shrinkage! Although I don't normally prewash quilting cottons, this is a good time to do so. Press fabric.
Fold full length of fabric in half, matching selvedge to selvedge. Shift selvedges like sliding closet doors, while keeping them matched, until fabric hangs evenly without any pulls or puckers. This is just as you would normally prepare yardage for cutting. You may need some help, since 2 yards is a lot to handle!
Place one end of the yardage on a large cutting mat, with the fold matched to a horizontal cutting line. Cut vertically through both layers of fabric, creating a straight edge.
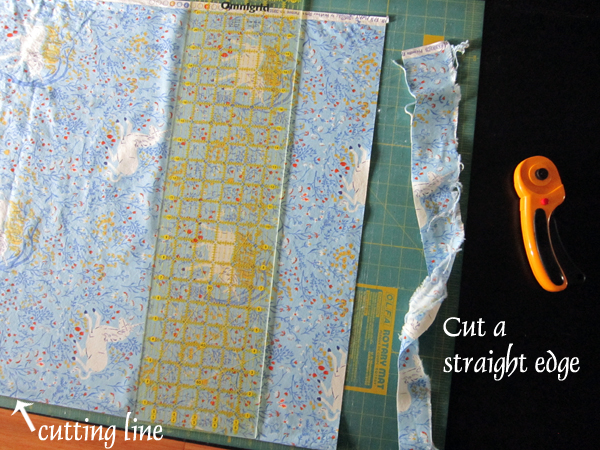
Keep the full length of yardage folded with selvedges matched and keep the newly cut straight edges matched. Pull the rest of the yardage onto the mat, folding back the cut straight edges until they land near the opposite ragged, raw edges. The fabric is now stacked four layers thick, with both long, folded edges matched to a horizontal cutting line. I'll call this a "double fold" of fabric.

Cut the yardage at 70" long. To do so, make your double fold 35" long, since 35" doubled equals 70" total. When the fold is arranged just right, and cut even with the first trimmed straight edges. You should have a total of 4 cut edges stacked neatly on top of each other.
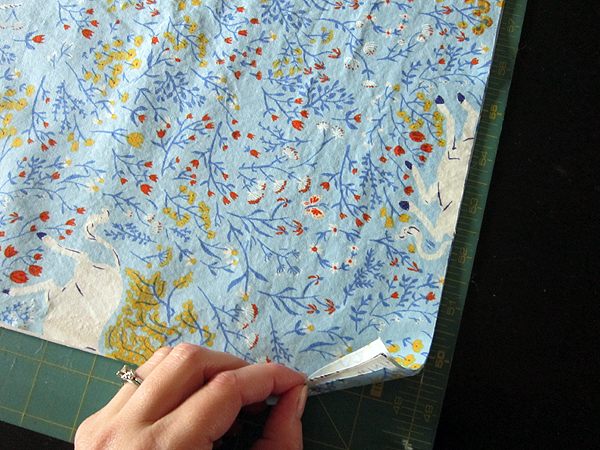
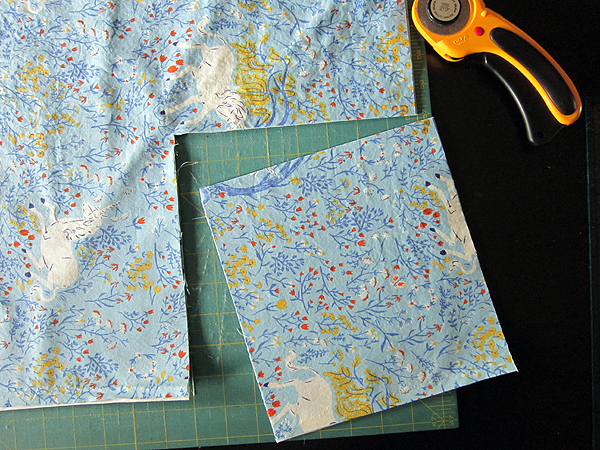
Do not remove selvedges! Keep selvedges intact for this project. Rotate the mat, if necessary, to easily access the corner of your stacked fabrics that has no folds. This is the selvedge/cut fabric corner of your fabrics. Use a regular quilting ruler or a square quilting ruler to cut an 8" square out of this corner of your stacked fabrics. Be sure you are cutting where there are no folds!

You will release (4) 8" squares total. Unlike for quilting, these squares don't need to be very exact. Now open up your fabric to see that you have created a long rectangle with 8" negative squares at each corner.
Step 2: Sew Corners
We'll sew each corner with durable French seams so the crib sheet will withstand many washings. Starting at one corner, match cut corner edges with wrong sides together.
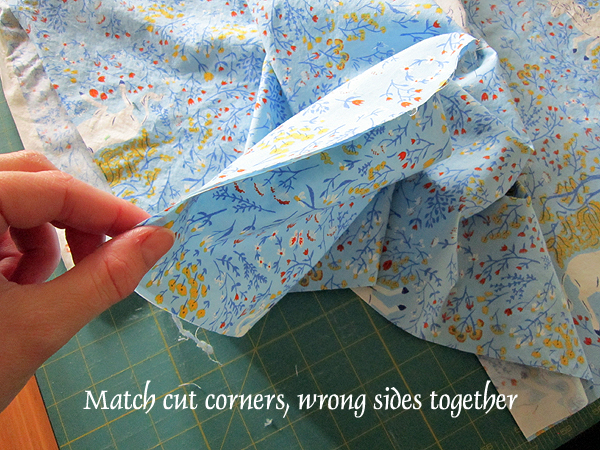
Sew a scant 1/4" seam, starting at the matched selvedge and sewing towards the center of your sheet. Backstitch at start and finish of this seam. As you near the end of the stitch line, let your stitch line curve slightly towards the body of the fabric, creating a somewhat generous seam allowance at the curve. This curve helps the corners of the crib sheet fit roundly against the mattress, rather than poking out. Again, there's not much need for accuracy here. Curve a little or a lot - it'll all turn out OK in the end. Trim excess seam allowance at the curve so that it is a scant 1/4".

Still working at the same corner, now fold fabrics with right sides together. The first seam will be hidden inside the folded fabrics. Sew a 3/8" seam to permanently encase your original seam. Again, start and finish with a backstitch to secure threads and do curve towards the body of the fabric at the one end of the seam.

Repeat at remaining 3 corners, closing each corner with a French seam.
Step 3: Insert Elastic
Press under all edges of your sheet first by 1/4" and then by 5/8". I use this handy hemming tool to quickly and accurately press under straight seams. We're creating a hemmed edge that will also serve as the elastic casing.
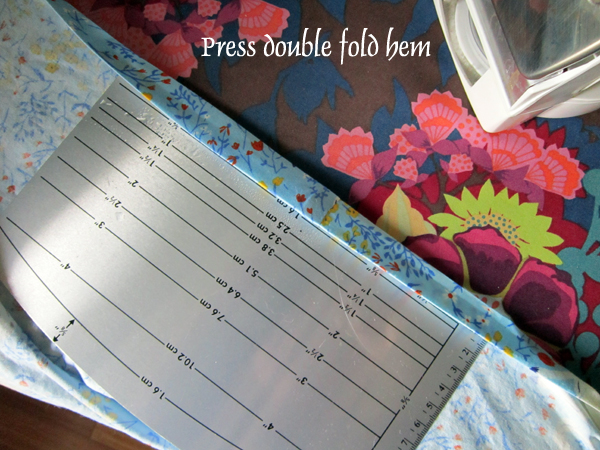
Sew down the hemmed edge with a 1/16" edge stitch. I sew with the wrong side of the hem facing up, so I can easily run the stitch line right against the hemmed edge. Don't sew all the way around though - leave about 4" open for inserting the elastic. Then use a large safety pin to thread your 80" cut of elastic into the casing.
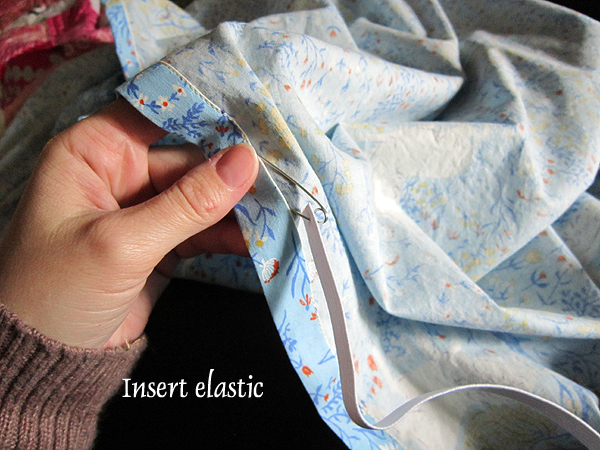
When you've brought the elastic all the way around (phew!) sew together both ends of the elastic with about 3" of overlap. There's no special way to sew the elastic. Just sew back and forth over it willy nilly! Then pin through both ends and through the hem at the opening. With all layers secured, you can now easily pull and shift and pull again until elastic is evenly distributed.
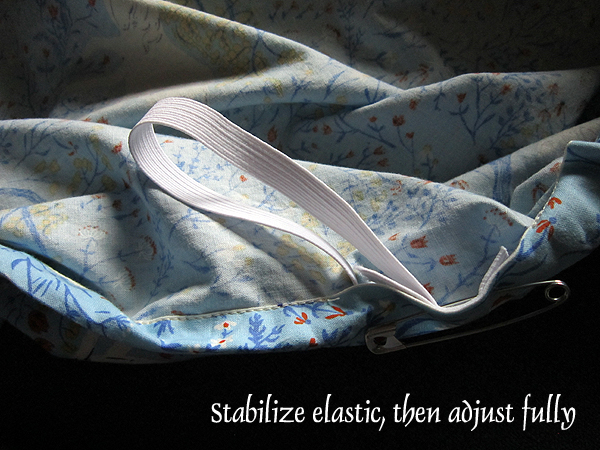
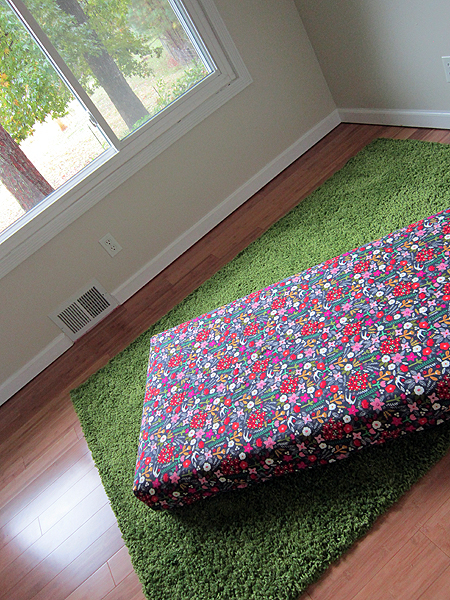
When elastic is in place, remove the safety pin and sew the opening shut with a 1/16" edge stitch. And, you're done! Pop it on your crib mattress to admire your handiwork!
This process definitely takes more time to describe than to actually do. I think you'll want to make another

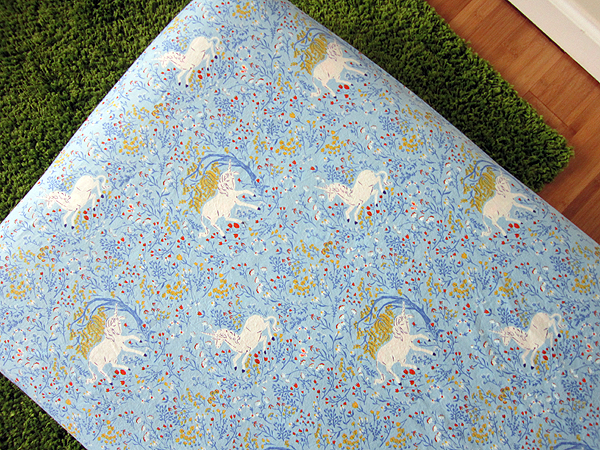
All fabrics shown here are courtesy of Windham Fabrics. The unicorns are by Heather Ross from Far, Far Away and the floral is by Carolyn Gavin. It's quite rewarding to see how well each sheet fits, front and back...
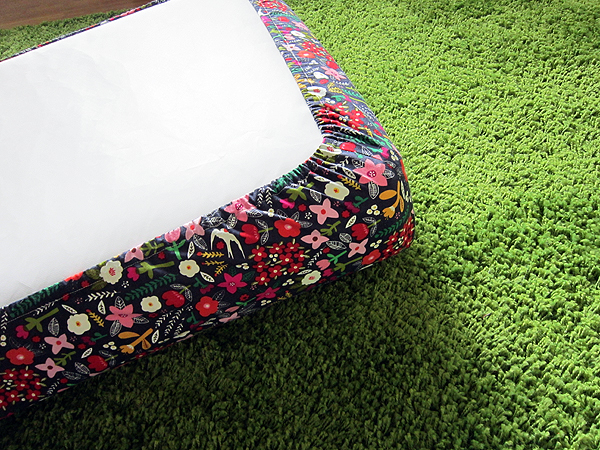
And to get to enjoy a favorite print all spread out and en masse.
Perfectly delightful! Now I just need to choose some more fabrics and make some more sheets. Because two will not be enough!
