Bottled Rainbows: Piecing & Adding Borders
This post is part of a series Bottled Rainbows {ticker tape quilt along}. You can join in anytime. We're going at a leisurely pace and using up our scraps! Please see this page for links to all posts.
Thank-you all for sharing in my excitement over my quilt-keeping "coup" (as miss StephMabry put it)! I am still laughing at how it all happened. Maybe Brandon secretly fell in love with Bottled Rainbows while he was up in the tree for yesterday's photographs? I guess we'll never know.
Before we get down to business with today's tutorial, I'll show you some sneak peaks of how I'm converting my Bottled Rainbow design into a queen-sized quilt. My original plan was to make a twin-sized quilt with the longer side of each Bottled Rainbow block oriented longways on the bed. I was going to add a 5" border to the Bottled Rainbow blocks to create a 74" x 90" twin sized quilt. And you can still do that!
However, making a queen necessitates a little switcheroo. I'm now orienting the longer side of each Bottled Rainbow block so that it runs horizontally across the bed. Happily, situated like this the quilt is wide enough for a queen, there's just some extra length needed (about a row's worth) which could have been added at the head or foot of the bed.
So I totally thought of making more Bottled Rainbow blocks in neutral or new colors or what not, but in the end I decided I wanted something totally different at the head of the bed.
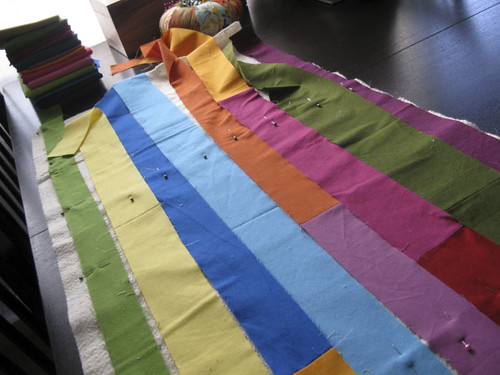
I cut looooong strips from my Kona solids of random lengths and widths and pieced them together to create horizontal stripes across the top of the quilt. I built the look with the quilt in place on my bed so that I could see exactly how the colors were balancing the Bottled Rainbow blocks. With everything just so, I transferred the strips onto a long piece of batting and pinned them in place (rather sloppily) just to keep their relationships correct.
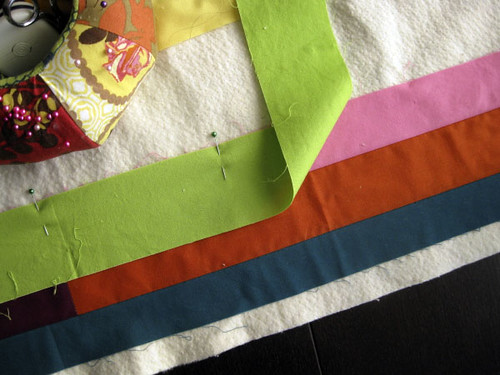
And then, here I am piecing them right onto the batting piece, in typical quilt-as-you-go fashion. When the stripey section was complete, I trimmed it up and pieced it to the top of my Bottled Rainbow block grid. Easy peasy! I'll show you the full reveal when the quilt is done - a little motivation for me, ok?
Piecing
Awhile back I showed you how to piece Bottled Rainbow blocks. Even though the blocks are backed with batting because we decided to quilt-as-you-go, they still join together in typical fashion - right sides together, stitch seam, press seam open. I originally used 1/4" seams when I made a sample row. However, I decided this weekend to switch to 3/8" seams on my quilt. The bit of extra seam allows me to hide a few mistakes I made where the edges of my blocks were short on batting or Kona cotton. I also find it easier to piece together such long, heavy rows as we have here when there's a little extra fabric under my presser foot.

I pieced the blocks together in columns (which you saw yesterday) and then pieced the columns. With only 16 blocks to join, it's over before you know it! At this point, your quilt top should measure 64" x 80" if you've used 1/4" seams.
Borders
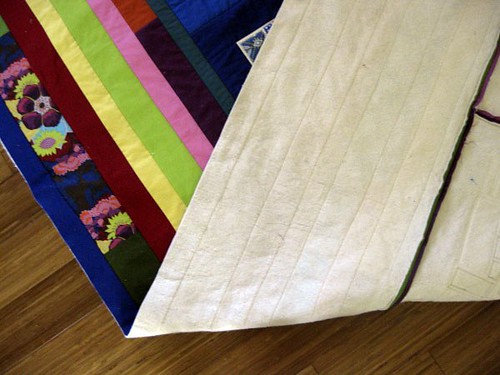
To make a twin-sized quilt, I recommend a 5" wide border on all 4 sides. You'll need to back each border strip with batting since the rest of the quilt is already batted. Don't worry - the sewing is as simple as can be. The cutting is most of the work! (Note: I decided against mitering my borders since working with the batting is likely to make that process more difficult. If desired, see this tutorial for how I miter borders).
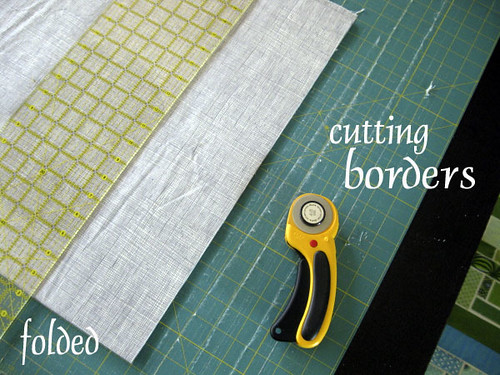
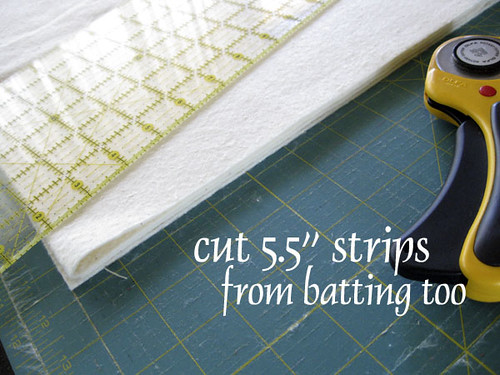
Begin by folding your border fabric in preparation for cutting 5.5" strips on the longest stretch of fabric. If you bought 1.5 yards of border fabric, as suggested here, the longest stretch of fabric runs parallel to your selvedge. (if you're not sure how to cut yardage into long strips, please see my detailed tutorial here. The tutorial sets you up for making a clean cut from selvedge to selvedge. Once you have created that clean cut, unfold and match up the newly cut clean edges. Then refold with clean edges matched instead of selvedges matched. Now you will be set you up for making a cut parallel to the selvedge.)
After trimming off selvedge, cut (4) 5.5" wide strips, each approximately 50" long if cutting a 1.5 yard length. Pair these up and piece together to create two extra long 5.5" wide strips. These are borders for the longer side of your Bottled Rainbow quilt, which measures 80".
Next cut (3) more 5.5" wide strips, each approximately 50" long. Pair up 2 strips and piece together to create 1 extra long 5.5" wide strip. Later on, you'll attach this extra long strip to the shorter side of your Bottled Rainbow quilt and then trim off the excess length. Next, you'll piece the extra length to the remaining 5.5"x 50" strip to create the fourth border strip for your quilt. For now, just set aside the extra long strip and the shorter strip while we work on batting.

Using batting scraps or fresh batting yardage, create batting strips for all four border sides. You'll need (2) that measure 5.5" x 80" and (2) that measure 5.5" x 74". Feel free to piece batting with a 1/4" seam to create the lengths you need. Also, don't worry if your batting strips are too long. You can easily trim them up as you go.
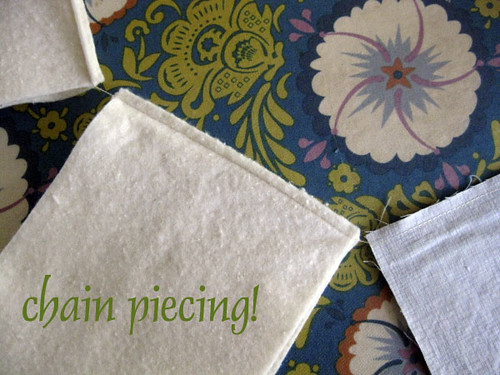
And don't forget that chain piecing can really speed things up!
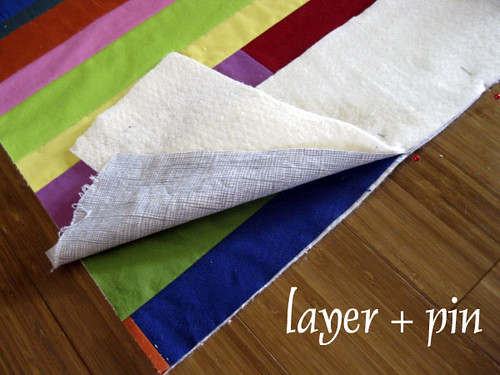
Now you're ready to do some stitching! Starting with the extra long border strips and your 5.5" x 80" batting strips, sew borders along the longest sides of your quilt first. To attach borders, lay the fabric right side down on the quilt top's edge. Neatly smooth it flat along the whole edge. Next, lay the batting strip on top of the fabric, again smoothing carefully. Pin through all 3 layers every 5" or so. At the sewing machine, stitch a 3/8" seam. Press seam open. Repeat on opposite side.
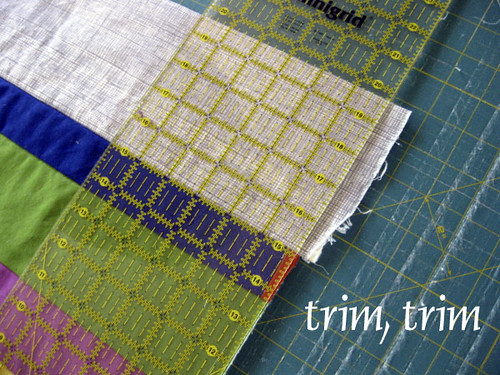
Before attaching the remaining shorter borders, trim the long borders so that they finish flush with the quilt top. Now layer the border fabric and batting as before on the shorter sides of the quilt, pin and stitch borders.
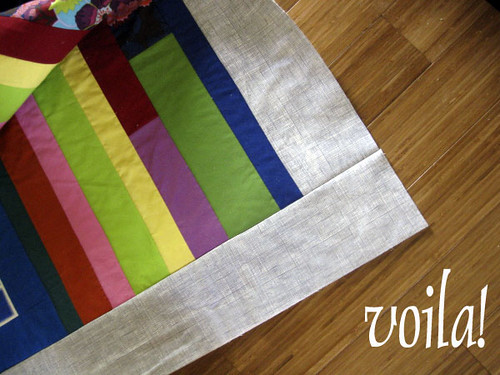
And I quite like how a neutral border looks with all this color! Thank-you for joining me on this journey!!!