Value Dance Quilt Tutorial, Part B
This tutorial series is part of the Value Added Quilt Along. Visit my intro post for links to all the lessons on using value in quilt design. Stop by the flickr group to share your photos and keep up with other quilt-along happenings.
How is your progress on Value Dance? I hope you had fun with it over the weekend!

Last week in Part A, I demonstrated how to make the 40 hourglass blocks required for my version of Value Dance. To complete the patchwork portion of this quilt, your next assignment is 40 on point square blocks! I like to think of each one as a sweet little gem.
You'll want to make 20 on point squares with light value square centers and dark value backgrounds. The other 20 on point squares should be dark value square centers with medium value backgrounds. For a refresher on how to sort prints by value for this quilt-along, see my post "sometimes it's tricky" as well as the value lesson posts by Leila and Amy.
Ok, let's sew!
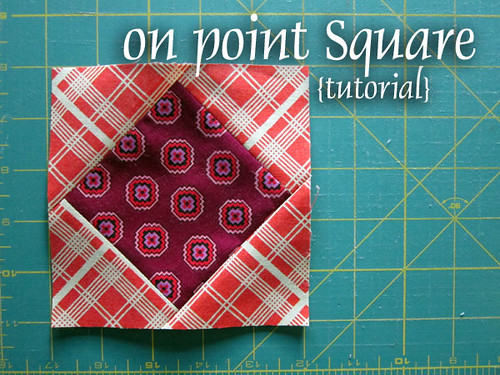
{On Point Squares Tutorial}
Step 1: Cutting
From your light value fabrics, cut 3 5/8" strips. Divide strips into 3 5/8" squares to create (20) light value 3 5/8" squares total. If cutting your light values from 4 fat quarters, you should be able to cut (5) squares from each fat quarter remnant left over from making hourglass blocks.
From your dark value fabrics, cut 3 5/8" strips. Divide strips into 3 5/8" squares to create (20) dark value 3 5/8" squares total. If cutting your dark values from 4 fat quarters, cut just (1) 3 5/8" x 22" strip from each fat quarter. Divide that strip to make (5) squares in each fat quarter print, for 20 total.
With your remaining dark value fabrics, cut 3.5" strips from each fat quarter print. Divide strips into 3.5" squares to create (40) dark value 3.5" squares total.
From your medium value fabrics, cut 3.5" strips. Divide strips into 3.5" squares to create (40) dark value 3.5" squares total.
Cut all 3.5" squares (dark value and medium value) in half on diagonal to create 2 triangles from each square. You should have 80 triangles total in each value group.
Step 2: Prepare Fabrics
I'll be demonstrating by sewing a dark value square with a medium value background. I suggest you sew all 20 on point squares of one kind of value pair (dark center/medium background, for example) before proceeding to the other value pair. To prepare, make piles of 4 background triangles on 1 square center. Pair fabrics that you especially like together!
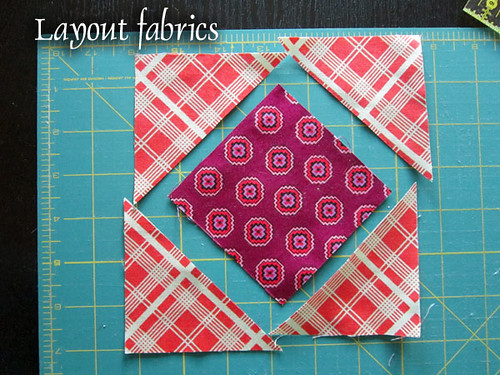
When ready to sew, I like to lay my triangle background pieces around the square, like so. If your background fabrics are directional, use this opportunity to lay them out so that the stripes or whatnot are flowing in a pleasing way.
Step 3: Sew
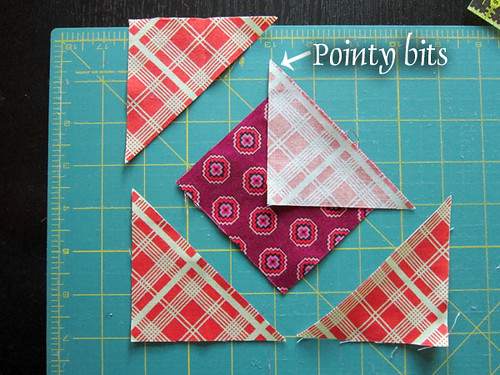
Begin by flipping a triangle right sides together to the square. Center the triangle so that the excess pointy bits of fabric extend approximately equally on both sides of the square. Sew with a 1/4" seam, as always.
Also, sew a triangle in the same way to the opposite side of the square. Press seams.
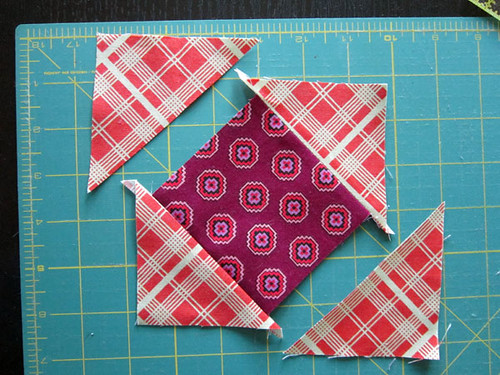
Trim away the triangle pointy bits (also called dog ears), using the straight raw edges of the square as a guide.
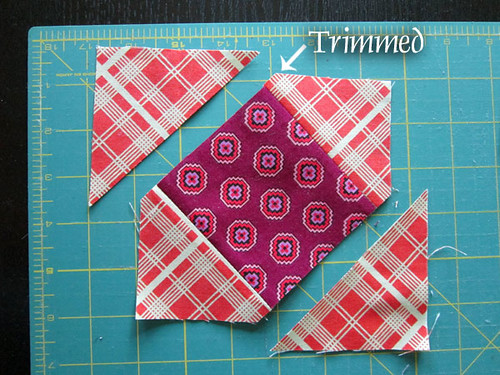
Flip another triangle background piece right sides together to the square. Again, center the triangle so that the excess fabric extends on both sides of the square. Less will stick out this time, but there should still be some excess triangle on each side of the square!
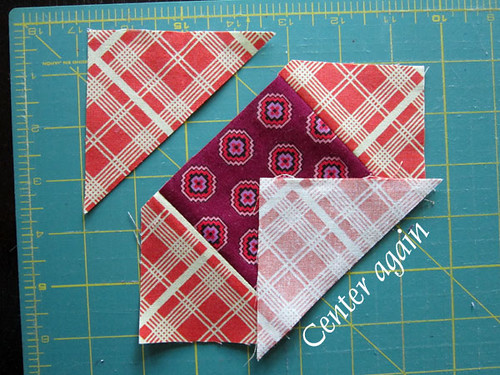
Sew the last triangle in the same way to the opposite side of the square. Press seams.
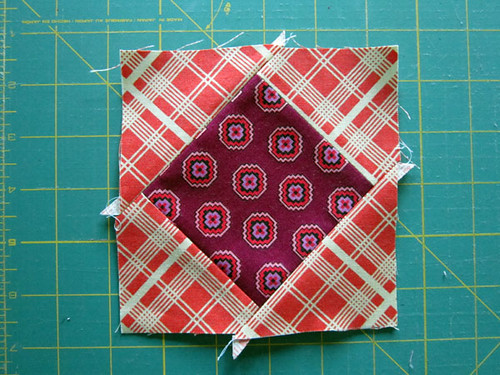
Step 4: Trim
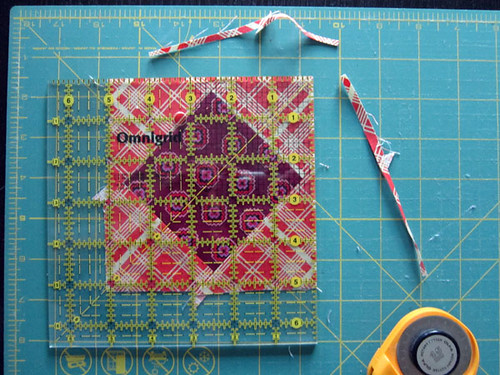
Once again, trimming is going to be important so that our patchwork squares and hourglasses can work together to create larger patterns. All on point square blocks must be trimmed to 5" square. When trimming take care not to cut off the 1/4" seam allowance that must extend in background fabric beyond each square point!
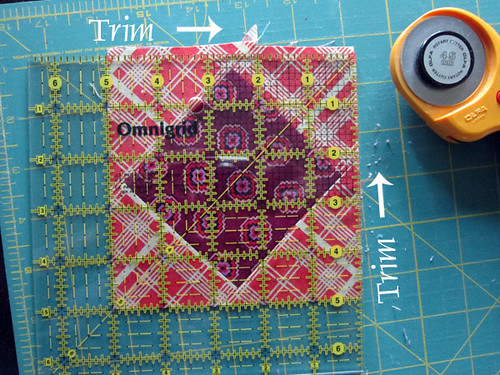
Place the ruler so that you can trim two sides of the square at once, using the 5" measurement lines as a guide. At this point, you want the block to remain slightly larger than 5". Also, be sure that the 1/4" seam allowances are preserved beyond each point of the square.
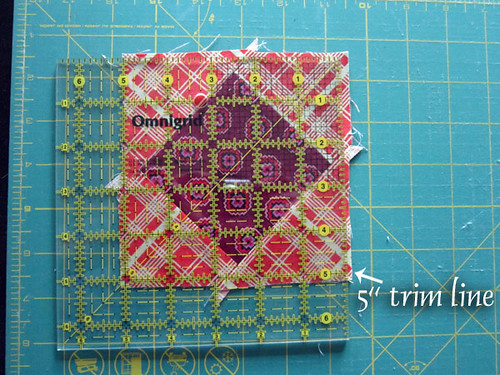
Trim at right (if right handed) and top of ruler before moving the ruler.
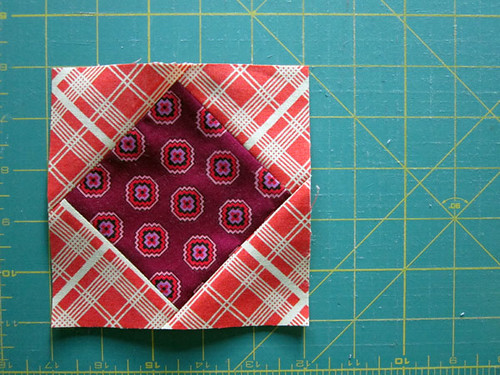
Rotate the block to trim the remaining 2 sides of the square. First, orient the ruler on the block using the 5" measurement lines. Trim remaining sides for a perfect 5" block.
Tips
Just as with our hourglass blocks, you can save time by chain piecing while sewing the triangle backgrounds. Work on a bunch of on point square blocks at once, sewing opposite triangles, pressing lots of seams, and then sewing remaining triangles.

To encourage yourself, set out hourglass blocks and on point squares in our patchwork layout from time to time to see how your hard work is going to pay off! It also will help you to test that value relationships are to your liking.
On Thursday I'll post Part C, with border and finishing instructions for your quilt! Until then, I'll be checking the Value Added Quilt-Along flickr group often, crossing my fingers that your project might show up this week!
How is your progress on Value Dance? I hope you had fun with it over the weekend!
Last week in Part A, I demonstrated how to make the 40 hourglass blocks required for my version of Value Dance. To complete the patchwork portion of this quilt, your next assignment is 40 on point square blocks! I like to think of each one as a sweet little gem.
You'll want to make 20 on point squares with light value square centers and dark value backgrounds. The other 20 on point squares should be dark value square centers with medium value backgrounds. For a refresher on how to sort prints by value for this quilt-along, see my post "sometimes it's tricky" as well as the value lesson posts by Leila and Amy.
Ok, let's sew!
{On Point Squares Tutorial}
Step 1: Cutting
From your light value fabrics, cut 3 5/8" strips. Divide strips into 3 5/8" squares to create (20) light value 3 5/8" squares total. If cutting your light values from 4 fat quarters, you should be able to cut (5) squares from each fat quarter remnant left over from making hourglass blocks.
From your dark value fabrics, cut 3 5/8" strips. Divide strips into 3 5/8" squares to create (20) dark value 3 5/8" squares total. If cutting your dark values from 4 fat quarters, cut just (1) 3 5/8" x 22" strip from each fat quarter. Divide that strip to make (5) squares in each fat quarter print, for 20 total.
With your remaining dark value fabrics, cut 3.5" strips from each fat quarter print. Divide strips into 3.5" squares to create (40) dark value 3.5" squares total.
From your medium value fabrics, cut 3.5" strips. Divide strips into 3.5" squares to create (40) dark value 3.5" squares total.
Cut all 3.5" squares (dark value and medium value) in half on diagonal to create 2 triangles from each square. You should have 80 triangles total in each value group.
Step 2: Prepare Fabrics
I'll be demonstrating by sewing a dark value square with a medium value background. I suggest you sew all 20 on point squares of one kind of value pair (dark center/medium background, for example) before proceeding to the other value pair. To prepare, make piles of 4 background triangles on 1 square center. Pair fabrics that you especially like together!
When ready to sew, I like to lay my triangle background pieces around the square, like so. If your background fabrics are directional, use this opportunity to lay them out so that the stripes or whatnot are flowing in a pleasing way.
Step 3: Sew
Begin by flipping a triangle right sides together to the square. Center the triangle so that the excess pointy bits of fabric extend approximately equally on both sides of the square. Sew with a 1/4" seam, as always.
Also, sew a triangle in the same way to the opposite side of the square. Press seams.
Trim away the triangle pointy bits (also called dog ears), using the straight raw edges of the square as a guide.
Flip another triangle background piece right sides together to the square. Again, center the triangle so that the excess fabric extends on both sides of the square. Less will stick out this time, but there should still be some excess triangle on each side of the square!
Sew the last triangle in the same way to the opposite side of the square. Press seams.
Step 4: Trim
Once again, trimming is going to be important so that our patchwork squares and hourglasses can work together to create larger patterns. All on point square blocks must be trimmed to 5" square. When trimming take care not to cut off the 1/4" seam allowance that must extend in background fabric beyond each square point!
Place the ruler so that you can trim two sides of the square at once, using the 5" measurement lines as a guide. At this point, you want the block to remain slightly larger than 5". Also, be sure that the 1/4" seam allowances are preserved beyond each point of the square.
Trim at right (if right handed) and top of ruler before moving the ruler.
Rotate the block to trim the remaining 2 sides of the square. First, orient the ruler on the block using the 5" measurement lines. Trim remaining sides for a perfect 5" block.
Tips
Just as with our hourglass blocks, you can save time by chain piecing while sewing the triangle backgrounds. Work on a bunch of on point square blocks at once, sewing opposite triangles, pressing lots of seams, and then sewing remaining triangles.
To encourage yourself, set out hourglass blocks and on point squares in our patchwork layout from time to time to see how your hard work is going to pay off! It also will help you to test that value relationships are to your liking.
On Thursday I'll post Part C, with border and finishing instructions for your quilt! Until then, I'll be checking the Value Added Quilt-Along flickr group often, crossing my fingers that your project might show up this week!
