Time-Saving Tips for Bulk Cutting
This post is part of a series: the Big Bed Quilt-Along. We're sewing along February - April 2018, but you can use the resources anytime to help you make a large quilt. Use hashtag #BigBedQAL to share your progress!

I'm loving your comments on recent Big Bed Quilt-Along posts. There are many unique ways to integrate quilting into our busy lives. Your collective wisdom is much appreciated!
Today let's talk about bulk cutting. Cutting your patchwork pieces all at once is much more efficient than cutting pieces block by block. I'm sure we all realize that. The question is how to stay organized and avoid making mistakes in the process. Here are some tips.
#1 - Make a Test Block
Before cutting all your fabrics, make up a test block. This allows you to double check that the pattern sews together as expected, without requiring any cutting adjustments. It also gives you a chance to see how directional fabrics may behave, which can definitely inform your cutting. Test out one of your favorite fabric or color combos for the quilt. In this way, the completed test block is a motivating reminder of your quilty aspirations.
#2 - Cut Backgrounds
Begin by cutting all your background fabrics. I know this can require math that might be avoided by cutting background fabric as-needed. However, it saves time to only handle the background fabric once. Plus, you tend to make fewer mistakes if you don't bounce around between cutting different pieces for your patchwork block.
Might you be short on background fabric? Find out by bulk cutting all of your background pieces at the start. If you must order more background fabric, it will arrive before you absolutely need it!

#3 Cut Featured Fabrics
Next, cut all your featured fabrics. Typically these are the colorful prints in your patchwork. Begin by pressing them all at once. Then, cut same-size block elements in batches, to reduce cutting errors and save time.
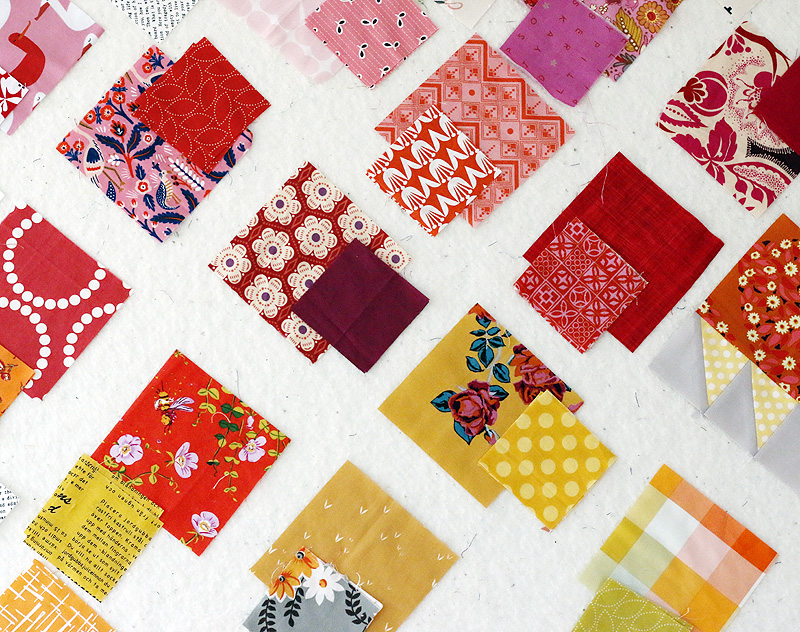
For example, I'm working on a block that requires a 4.5" square and (2) 3" squares per block. First I cut all 4.5" squares required by my project. Next I cut all 3" squares, pairing them with 4.5" squares as I went. In this way, you can cut multiple same-size squares from one strip of fabric, saving time and using your fabric efficiently.
#4 Organize!
Of course, all of these cut pieces might become a tangled mess without a little organization. There are endless ways to stay organized. Here are two that I like:
Design Wall
As I cut, I like to arrange my pieces on my design wall as if they were sewn blocks. This helps me choose colors and spread prints throughout the quilt. I can see at a glance if I've used a certain print too much or not enough.
Don't have a design wall? You can also use a large table or floor space to see your fabrics while cutting. Or, consider tacking a piece of batting to the wall for a temporary design wall. It totally works!
Stacks
Sometimes it's not necessary to see my quilt take shape as I cut. Instead, I might make stacks of patchwork shapes grouped by block. I place the largest patchwork piece on bottom and the smaller pieces on top. If I'll be putting them away, I hold each block-stack together with one pin. Then the stacks can be layered in a drawer, basket or shelf with ease.
Do you have any tips on how to bulk cut and stay organized?


