the one about quilting
Because, you know, I don't normally write about quilting... Ok, I guess I do, but it seems like I'm thinking and writing about a whole lot else lately. With how much I'm gone out of town for therapy and the new homeschool year, I'm really having to push to find time to sew. I create "systems" or rhythms in my life to keep me organized and moving forward on the things that count. Having Eleni has required a constant flux and tweaking of those systems, with times of overwhelm where everything functions but the living seems to get squeezed out. Still I refuse to let sewing and my time here at Stitched in Color to fall through the cracks. This feeds me.
Today I'm talking about quilting.
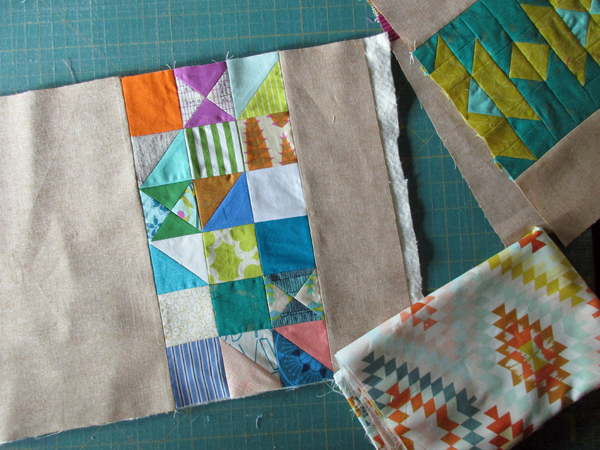
This morning I added Essex linen/cotton blend in leather to either side of the 6" wide patchwork pieces I created for that set of placemats. Together with this pretty Wanderer backing, it's all the ingredients I need for a successful finish if only I can get the quilting right.
Quilting still intimidates me. Today I formulated a plan, threaded my sewing machine and paused, poised on the brink of stitching. I wonder, just as you do, how that quilting plan will look once implemented. Will it detract from and ruin my patchwork? Will I end up picking out stitches, painstakingly erasing my mistakes?
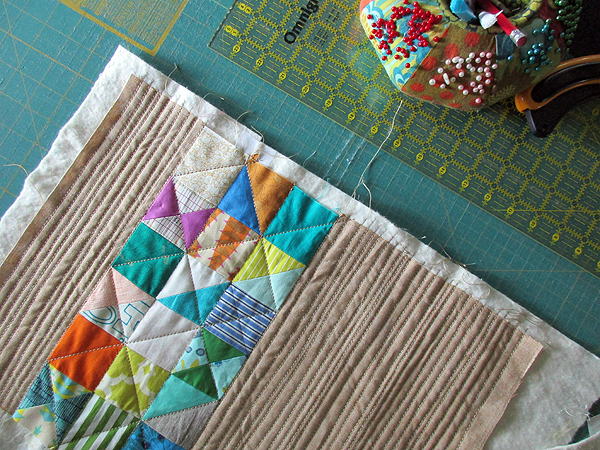
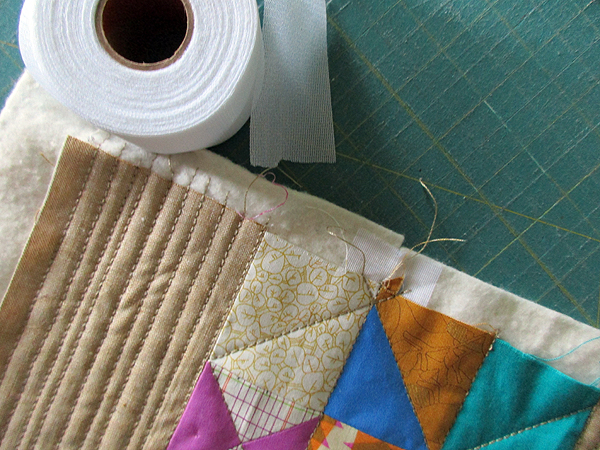
This is my first piece. I worked organic straight line quilting over the solid Essex portions and some geometric straight lines on the patchwork. I love how the thick Aurifil 12wt thread stands out over the Essex section. It creates a fantastic dimension with these dense and free-form quilting lines. I hope that the same thread doesn't stand out too much over the patchwork portion? But over all, I'm pleased. It worked! Phew. That would be a lot of thread to take out!
Want to do something similar? Organic straight lines are a therapeutic way to quilt. Mistakes aren't mistakes. How nice! Plus, you don't have to do any marking. Here are some tips.
First I used curved basting pins to baste the placemat tops with one layer of batting and fabric backing. Then I quilted straight-ish lines, about 2" apart. As I quilted these lines, I ran the work through the machine traveling in opposite directions. These lines are anchoring the work so that it doesn't keep dragging to one side from the force of dense quilting. Most of the lines I tried to make straight (just eyeballing it), but a few I deliberately allowed to curve.
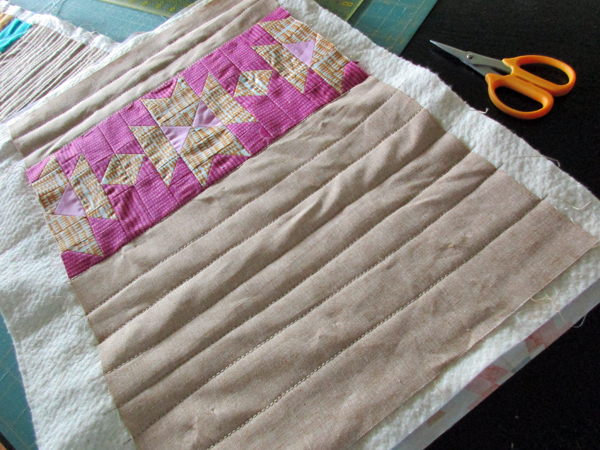
Once those anchoring lines are in, just go to town filling in lines in between. You won't be sure how close together you want to make those lines until you try. My advice is to begin filling them in a little sparser than you think and then go back to add more lines if you like. That way you don't over commit yourself to uber-dense quilting from the get go.
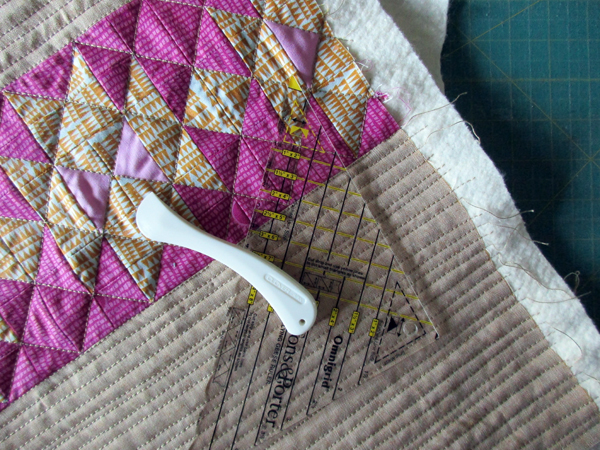
For straight, geometric quilting (as I did over the patchwork) I use a hera marker to mark creases in the patchwork. Then I follow the creases with thread as tidily as possible. I wouldn't want to take the time to mark up a whole quilt with a hera marker, but the increased accuracy is definitely worth it on a small piece like this.
And speaking of small pieces... I really dig using up batting scraps on small projects. Here I used some Heat Press tape to fuse two small pieces of batting together into a large enough rectangle for one placemat. If you don't have fusing tape, try zigzaging batting together by simply butting up the straight edges of batting and stitching so that the zigzag stitches fall alternately on each batting piece. Because you will quilt the work, you can be assured that the batting "crack" will be reinforced rather than drifting apart or bunching up.
And that's where I stop. We're off today to a rather important neurology follow up. Cringe. But let's not part that way. Let's part with this:
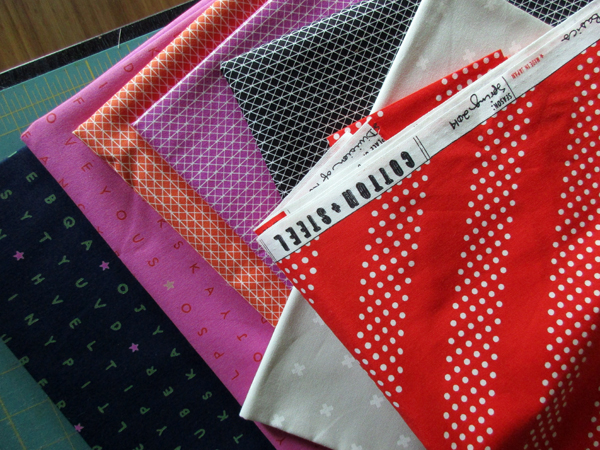
A pretty stack of Cotton & Steel arrived yesterday from Marmalade Fabric's clearance sale. Yum.
Today I'm talking about quilting.
This morning I added Essex linen/cotton blend in leather to either side of the 6" wide patchwork pieces I created for that set of placemats. Together with this pretty Wanderer backing, it's all the ingredients I need for a successful finish if only I can get the quilting right.
Quilting still intimidates me. Today I formulated a plan, threaded my sewing machine and paused, poised on the brink of stitching. I wonder, just as you do, how that quilting plan will look once implemented. Will it detract from and ruin my patchwork? Will I end up picking out stitches, painstakingly erasing my mistakes?
This is my first piece. I worked organic straight line quilting over the solid Essex portions and some geometric straight lines on the patchwork. I love how the thick Aurifil 12wt thread stands out over the Essex section. It creates a fantastic dimension with these dense and free-form quilting lines. I hope that the same thread doesn't stand out too much over the patchwork portion? But over all, I'm pleased. It worked! Phew. That would be a lot of thread to take out!
Want to do something similar? Organic straight lines are a therapeutic way to quilt. Mistakes aren't mistakes. How nice! Plus, you don't have to do any marking. Here are some tips.
First I used curved basting pins to baste the placemat tops with one layer of batting and fabric backing. Then I quilted straight-ish lines, about 2" apart. As I quilted these lines, I ran the work through the machine traveling in opposite directions. These lines are anchoring the work so that it doesn't keep dragging to one side from the force of dense quilting. Most of the lines I tried to make straight (just eyeballing it), but a few I deliberately allowed to curve.
Once those anchoring lines are in, just go to town filling in lines in between. You won't be sure how close together you want to make those lines until you try. My advice is to begin filling them in a little sparser than you think and then go back to add more lines if you like. That way you don't over commit yourself to uber-dense quilting from the get go.
For straight, geometric quilting (as I did over the patchwork) I use a hera marker to mark creases in the patchwork. Then I follow the creases with thread as tidily as possible. I wouldn't want to take the time to mark up a whole quilt with a hera marker, but the increased accuracy is definitely worth it on a small piece like this.
And speaking of small pieces... I really dig using up batting scraps on small projects. Here I used some Heat Press tape to fuse two small pieces of batting together into a large enough rectangle for one placemat. If you don't have fusing tape, try zigzaging batting together by simply butting up the straight edges of batting and stitching so that the zigzag stitches fall alternately on each batting piece. Because you will quilt the work, you can be assured that the batting "crack" will be reinforced rather than drifting apart or bunching up.
And that's where I stop. We're off today to a rather important neurology follow up. Cringe. But let's not part that way. Let's part with this:
A pretty stack of Cotton & Steel arrived yesterday from Marmalade Fabric's clearance sale. Yum.
