Retro Flowers Mini
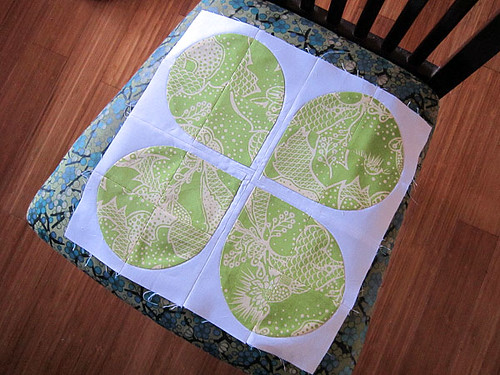
Earlier this week Retro Flowers no. 4 came to be. I think she's the most understated block so far, but this Filigree print always seems to enhance other prints, so I quite welcome her simple beauty. Every time I finish one of these blocks it's like a little sewing high. That goofy "I did it!" smile breaks across my face and I think again that Christina Lane deserves major props for creating such a pretty block.
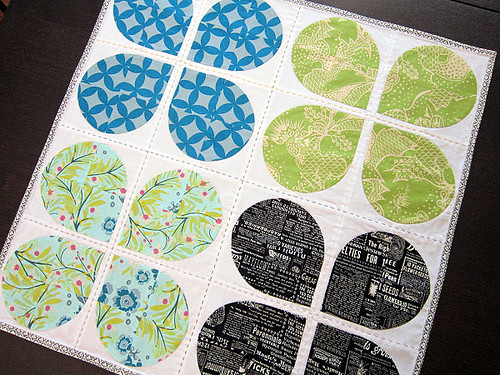
So, I knew all along that I was making a mini. Are you terribly disappointed? I wanted a quite reachable goal as my first project with this pattern and I also had in mind to hang the mini over my ironing board.

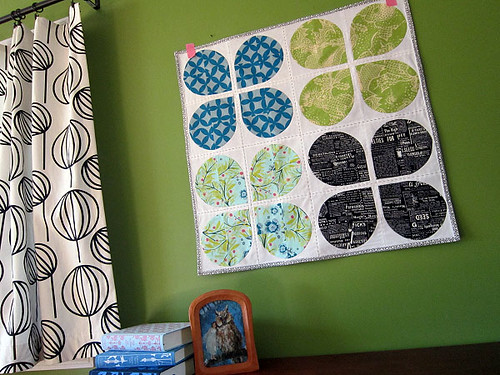
But, as it turns out I think the mini looks even better here, on these luscious green walls. Our "green room" is our entry room, my office and our homeschooling room with an art area for the kids. It's one of my favorite rooms because that particular shade of green just feels so good to me.
Those curtains were the fateful project that inspired the purchase of a rotary cutter and self-healing mat. I guess I owe a lot to that moment, and to my friend Miranda who told me I would never regret the investment. Good golly, was she right! Please, please, please don't hesitate to buy a rotary cutter set up if you like to sew. You think you like sewing. When you have those tools you'll find you LOVE it. (See here for info on sewing tools for getting started.)

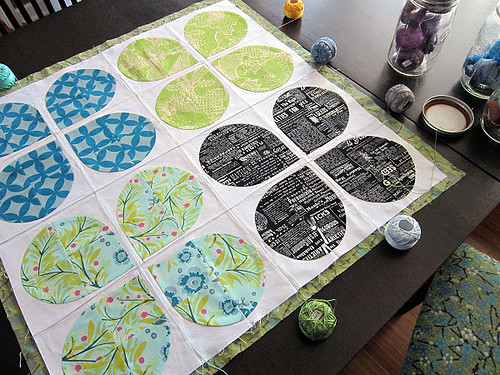
I backed my mini with some leftover fabric from an old Urban Outfitters coverlet. It's kinda stiff fabric, so this seems like a good application. Oh, and I skipped batting. Is that bad? I realized I don't want a puffy look for my hung mini's (this being just my second) so batting seemed conventional, but unhelpful. And my binding is a Ghastly Clover print.
Being a mini, this quilt was ripe for hand quilting. Here I'm laying different colors of pearl cotton across the quilt to make my selections. All of the colors I settled on are from Anna Maria Horner's pearl cotton sets, with the addition of yellow. The pale gray pearl cotton doesn't show up in these pictures, but looks nicely subtle in person.
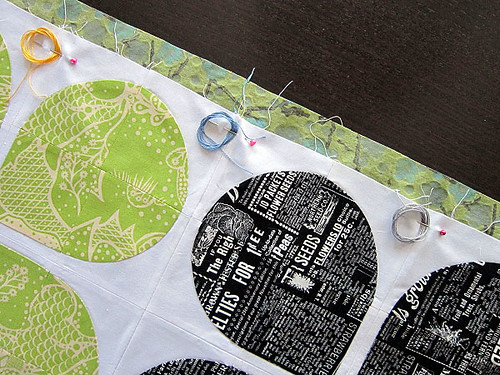
Me being me I couldn't choose just one color of thread for the hand quilting. Once decided, I cut pieces to length and pined them at the start of each stitch line. And, happily, they did not get tangled!
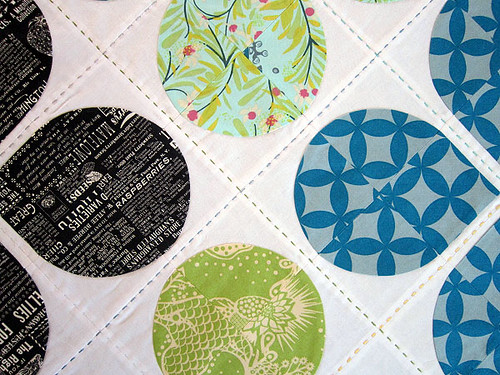
At first I thought I'd stitch around the petal shapes, but after some hemming and hawing these straight lines won the day. It's a nice contrast to all the curves, me thinks. And, oh did I enjoy the hand quilting! It's time for me to pull out the Loulouthi quilt and finish her up as well.

So, I'm quite happy with the finished quilt. I love her pretty-modern vibe. The black flower totally does it for me. Now I will take a moment here and thank Christina (again) for making this charming design. It really forced me to dive head first into sewing curves and I couldn't be happier with the journey so far. If your heart has fallen hard for this design, but you really feel intimidated by the challenge, I know you'll be in a different place having come through the Curves Class. So, yes, I do encourage you to sign up for class! I have been so blessed by your reaction to the Curves Class already. A very warm thank-you to all who have encouraged me to follow this path!
p.s. I'll be sending out a welcome email to everyone who has registered for the class so far tonight or tomorrow. The welcome email will include a link to purchase Christina's retro flowers pattern at 50% off. Thanks for your patience!
