Mitered Frame Tutorial
Newbie Disclosure: I am self-taught seamstress who's owned a sewing machine for less than one year and learned most of my skills via books and web tutorials. I don't claim that this is the best or only way to accomplished a mitered border frame. The thing is I really appreciate online tutorials and this method worked very well, so I thought I'd share it. Without further ado...
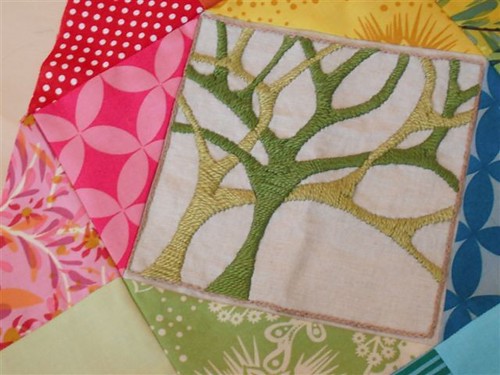
For my Living Color Pillow, I desired to create a natural linen frame around the finished square block above. The corners of that frame needed to be mitered to support my quilting design. I chose to make the frame all in one color, but this method would allow you to use different fabrics for different sides of the frame. Here's how:
1. Cut Border Strips: Determine the desired width or thickness of your frame. I wanted a frame 3.5" thick. Next measure the length of one side of the block. Cut strips as wide as desired, but with an extra 1/2" for seam allowances (4" in my case) and with a length to equal Block Length + Desired Width (x 2) + 1".
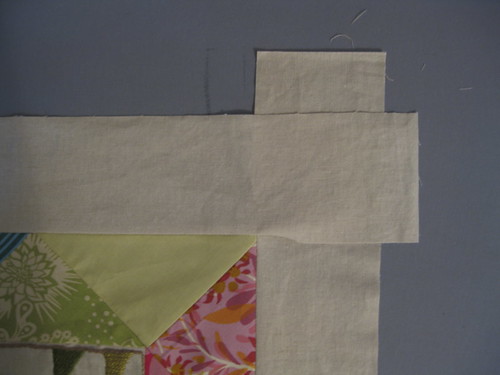
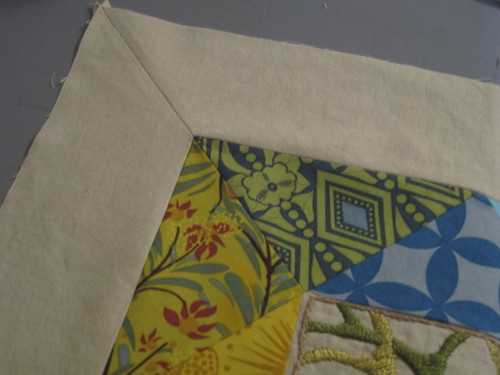
2. Sew Strips on Block: Take one strip and center it on one side of your block with right sides together. Align edges and sew with a 1/4" seam allowance, backstitching at start and finish Sew just to the edge of each block, leaving the extra length flapping off each side. Press seam open. Repeat for each side. Your corners should look like this:
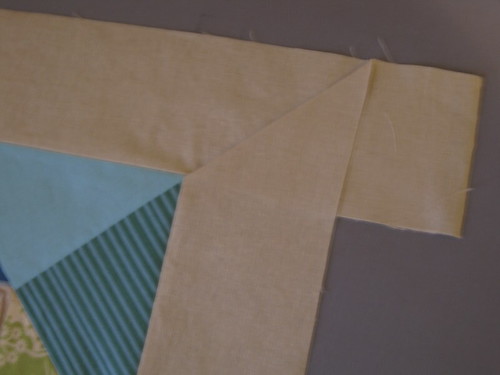
3. Press Miter: Now fold one of your flapping sides under in such a way that it aligns exactly with the other border strips. This will create a perfect diagonal fold. Press this fold to create a guideline for your stitches.
For my Living Color Pillow, I desired to create a natural linen frame around the finished square block above. The corners of that frame needed to be mitered to support my quilting design. I chose to make the frame all in one color, but this method would allow you to use different fabrics for different sides of the frame. Here's how:
1. Cut Border Strips: Determine the desired width or thickness of your frame. I wanted a frame 3.5" thick. Next measure the length of one side of the block. Cut strips as wide as desired, but with an extra 1/2" for seam allowances (4" in my case) and with a length to equal Block Length + Desired Width (x 2) + 1".
2. Sew Strips on Block: Take one strip and center it on one side of your block with right sides together. Align edges and sew with a 1/4" seam allowance, backstitching at start and finish Sew just to the edge of each block, leaving the extra length flapping off each side. Press seam open. Repeat for each side. Your corners should look like this:
3. Press Miter: Now fold one of your flapping sides under in such a way that it aligns exactly with the other border strips. This will create a perfect diagonal fold. Press this fold to create a guideline for your stitches.
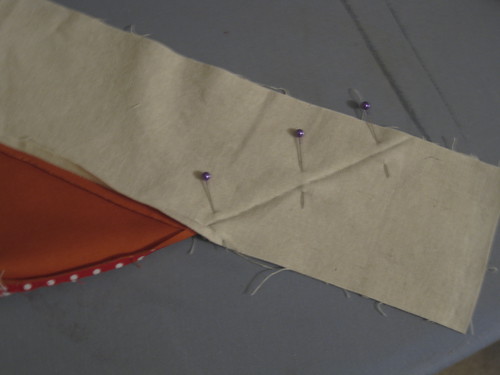
4. Fold & Pin: Ok, now this part is a little tricky. You want to maintain the alignment of your border strips on that corner while folding the block in half. Fold the block corner to corner with right sides together. When you fold it the right way, the border strips you are working with will lay flush on top of each other and your pressed seam will be exposed. Pin along pressed seam and darken with a pencil or other marking tool if desired.
5. Stitch Corner: Stitch along line all the way to the block corner. Trim seam and press open. Voila!
If you have any questions, please ask them right here in the comments so that everyone can benefit. Thanks!
